
With candy canes and sprinkles lining grocery store shelves, holiday season just screams, "sugar cookies!" Around this time each year, I toss aside my fanciest dessert recipes and opt for the more humble sugar cookie instead. Sugar cookies can be enhanced any which way, from flavoring the dough to adding crushed candy to topping with sprinkles and frosting....with so many variations, there's truly a sugar cookie for everyone.
I made sugar cookies twice this season, both times differently than I have before. When Jackie hosted a cookie-making-and-decorating party (a blast, as you may have guessed), I was introduced to the wonder that is maple extract. It's not the easiest to find, but I'll be keeping it close for those times when I'm craving maple flavor, but adding maple syrup would change the texture. Apparently 5 lbs. of cookie dough and lots of intermittent nibbling wasn't enough for me, so I decided to make another batch at home. For those, I used vanilla extract and just a bit of molasses, which imparted an earthy flavor to otherwise regular sugar cookies. I highly recommend these recipes, and I've included both of them below.
At Jackie's party, we had the full gamut of cookie decorations as our disposal, from trusty powdered-sugar-milk icings to ginger-flavored sugar and other fancy treats. While those were loads of fun to play with, back at my house I used crushed candy instead. You can do so many things with crushed candy canes and heath bars, the two I used: you can incorporate them into the dough, sprinkle or press them on top of each cookie, or fill them into holes in your cookies to make a stained-glass effect, as Elise does here.
Any way you choose, it's pretty hard to go wrong. So make a double batch of these and keep'em around this holiday season. Your family, friends, and uninvited guests will surely thank you.
Rolled Maple Sugar Cookies
courtesy of Jackie and her friend's mom
Ingredients
To make frosting:
Put 1/2 cup of powdered sugar in a small bowl, and add milk by the Tbsp. until the mixture is the thickness of syrup. A thinner icing will run more easily and take longer to dry; a thicker one will run less and dry more quickly, but is harder to manipulate into shapes.
Old-fashioned Sugar Cookies
adapted from Epicurious
Read more!

Sunday, December 23, 2007
Holiday Cookies


Tuesday, December 11, 2007
Good 'Ole Apple Pie

Apple Pie has been done, done, and done again. If you skim anyone's list of cookbooks or blogs, you'll find infinite declarations of how to make apple pie. Some claim to have the definitive recipe. Since I have never (to the best of my memory) actually made an apple pie, start to finish, from scratch, I'm certainly not going to promise that the results of this first attempt are worth repeating. However, I can say that I learned a great deal, and I'm positive that this post will impart at least one valuable apple-pie baking recipe (which so many others have discovered before I did): apple pies are best with regular top crusts. The lattice doesn't trap enough of the steam inside, and the apples either don't cook through, or don't get coated with that lovely apple pie sludge. Next time, I'll forgo the beautiful lattice and stick to the easier top crust. Save your lattices for berry pies and other juicy things. That said, the sludge that this pie produced (in my humble opinion) perfectly balanced sweet and tart. The apples were soft but still toothsome, and the syrup that oozed from each slice was delightful. By the time the pie was actually gone, the dish needed very little scrubbing, as I'd been sneaking fingerfuls of the goo all along.
Here's the info about my pie, element by element: The Crust
It's fashionable to avoid transfats these days. They're pretty darn bad for you, and you're definitely better off with butter. Plus, never growing up with much margarine or shortening in the house, they freak me out a bit, and I tend to associate them with spam and other such delicacies. However, Friday night dinner was meat, so I couldn't use butter in the crust, and frankly, oil is simply an unacceptable substitute in proper pie dough, so I caved and used margarine. I now understand why people use it, scary as it may be: it produces a perfectly flaky dough that's neither tough or overly dense. I'd say I'd do it again, but I won't. Hey, it was good while it lasted. As for the lattice top, it's really not as complicated to make as it looks. An instructional video can be found here. Basically, the methodology is as follows: cut 16 1/2-inch strips from your second disk of rolled-out dough. Lay eight of them across the pie in one direction, equidistant from each other. Now, fold every other strip back over itself almost all the way, and lay down your first crossing strip. Unfold the folded strips over, and fold the other strips over themselves (that is, every other strip, but the ones that run under the first cross strip). Now, lay the next strip down. Unfold the folded strips, fold the unfolded strips, and lay down the next cross strip. Keep alternating this way until all strips are laid, and you'll find a perfect lattice crust.
The apples
People are so particular about which apples to use in a pie. These taste better, these hold their shape better, those are just horrible in pies, etc. I say, there's no such thing as an apple that's horrible in pies. They're all pretty darn good. So I picked up the "seconds" at the farmers market: with a couple of bruises here and there, seconds run about 89 cents a pound -- not bad for farm-fresh apples. It turns out that I used a mix of braeburn, honeycrisp, jonathan, and jonagold, and I was very pleased. The verdict? Use whatever's in the fridge. Just stay away from red delicious which taste less-than-wonderful and macintosh, which get kinda mushy.
The add-ins
I'm a big fan of quinces. The little suckers will give you quite a run for your money if you dare try to peel or (gasp!) slice them up, but once chopped, sugared, and cooked, quinces elevate any old apple pie and impart an unparalleled complexity of flavor. Quinces should be sauteed before added to pie, as they take longer to cook than apples (and are quite unpleasant if undercooked). I like to boil them in a very diluted simple syrup with a bit of vanilla and cinnamon.
Basic Flaky Pie Crust
adapted from The Pie and Pastry Bible (© 1998 Cordon Rose, Inc.) by Rose Levy Beranbaum
(Pastry for a 9-inch lattice pie, a 9-inch deep-dish pie, a 10-inch pie shell, or a 12- to 14-inch free-form tart
- 9 tablespoons unsalted butter or margarine, cold
- 1 1/2 cups (dip and sweep method) bleached all-purpose flour
- 1/4 teaspoon salt
- 3 1/2 to 4 1/2 tablespoons ice water
- 1 1/2 teaspoons cider vinegar
- 1/8 teaspoon baking powder (optional, and I didn't use it; if not using, double the salt)
- Divide the butter into two parts, about two thirds to one third: 6 tablespoons and 3 tablespoons.
- Cut the butter into 3/4-inch cubes. Wrap each portion of butter with plastic wrap, refrigerate the larger amount and freeze the smaller for at least 30 minutes. Place the flour, salt, and (optional) baking powder in a reclosable gallon-size freezer bag and freeze for at least 30 minutes.
- Place the flour mixture in a food processor with the metal blade and process for a few seconds to combine. Set the bag aside.
- Add the larger amount of butter cubes to the flour and process for about 20 seconds or until the mixture resembles coarse meal. Add the remaining frozen butter cubes and pulse until all of the frozen butter is the size of peas. (Toss with a fork to see it better.)
- Add the lowest amount of the ice water and the vinegar and pulse 6 times. Pinch a small amount of the mixture together between your fingers. If it does not hold together, add half the remaining water and pulse 3 times. Try pinching the mixture again. If necessary, add the remaining water, pulsing 3 times to incorporate it. The mixture will be in particles and will not hold together without being pinched.
- Spoon the mixture into the plastic bag. (For a double-crust pie, it is easiest to divide the mixture in half at this point.)
- Holding both ends of the bag opening with you fingers, knead the mixture by alternately pressing it, from the outside of the bag, with the knuckles and heels of your hands until the mixture holds together in one piece and feels slightly stretchy when pulled.
- Wrap the dough with plastic wrap, flatten it into a disc (or discs) and refrigerate for at least 45 minutes, preferably overnight. (For a pie shell and lattice, divide it in a ratio of two thirds:one third — use about 9.5 ounces for the shell and the rest for the lattice, flattening the smaller part into a rectangle.)
- Store, refrigerated, up to 2 days; frozen, up to 3 months.
- The Pastry Bible's explanation of what's goin' on:
Pastry flour offers the most tenderness while maintaining flakiness, but it is the addition of vinegar that relaxes the dough without losing flakiness, making it easier to roll, shrink less, and be even more tender. The baking powder lifts and aerates the dough slightly without weakening it, but it makes it seem more tender.
Thes secret to success is finely incorporating about two thirds of the butter into the flour, which keeps the flour from absorbing too much water and forming gluten, which would make the crust tough. The remaining one third of the butter is incorporated in larger pieces, which serve to seperate the layers, resulting in the desired flakiness. This pie crust does not shrink or distort as much as the standard all-butter crust because there is less gluten development.
If when adding the water, you find you need more than indicated in the recipe, chances are you haven't moisture-proofed the flour adequately (you haven't used the correct amount of butter or processed it fine enough), leaving the flour free to absorb more liquid. The resulting crust will be flakier but less tender.
If you find you need less water than specified in the recipe, chances are you divided the butter incorrectly and used too much of it to moisture-proof the flour, preventing it from absorbing an adequate amount of water. The resulting crust will be more tender but not very flaky.
Flattening the newly formed dough into a disc or discs before refrigerating makes it easier to roll without cracking. The dough is refrigerated to relax the gluten, making it less elastic and easier to roll. Chilling also firms the butter, preventing sticking and the need for extra flour when rolling, which would toughen it. Dough that has rested overnight before baking shrinks less.


Apple Pie adapted from Deb at Smitten Kitchen
- 3 1/2 lbs apples (about 8)
- 1 quince
- 1 vanilla bean, split lengthwise, or one dash vanilla
- 2 cups water and 1/4 cup sugar
- 2 tablespoons juice and 1 teaspoon zest from 1 lemon
- 3/4 cups sugar
- 2 tablespoons all-purpose flour
- 1/4 teaspoon salt
- 2 teaspoons cinnamon
- 1/2 teaspoon ground nutmeg
- 1/2 teaspoon ground allspice
- Over medium heat, combine 2 cups water, 1/4 cup sugar, and vanilla. Stir until sugar dissolves. Peel and chop quince, removing the core. Add sliced quince to simple syrup and cook over medium for about 20 minutes, until quince pieces are soft-ish.
- Adjust oven rack to lowest position and heat rimmed baking sheet and oven to 500 degrees. Remove one piece of dough from refrigerator (if refrigerated longer than 1 hour, let stand at room temperature until malleable).
- Roll dough on lightly floured work surface or between two large sheets of wax paper, to about 1/2-inch thick. Fold dough in half, then over itself again into quarters, and transfer dough to pie plate, placing dough point in center of pie plate and unfolding. Working around circumference of pie plate, ease dough into pan corners by gently lifting dough edges with one hand while pressing around pan bottom with other hand. Leave dough that overhangs lip of plate in place; refrigerate dough-lined pie plate.
- Peel, core, and slice apples into about 8 slices each. Toss with lemon juice and zest. In a medium bowl, mix ¾ cup sugar, flour, salt and spices. Toss dry ingredients with apples. Add cooked quinces and toss. Turn fruit mixture, including juices, into chilled pie shell and pile heavily in center.
- Preheat oven to 425 degrees.
- Roll out second piece of dough to 1/2-inch thick disk. Slice into 16 strips, and follow the instructions above for a lattice top. Alternatively, simply lay the second disk atop the apples in the same manner as you lined the pie plate with the first disk. Trim top and bottom edges to ½-inch beyond pan lip. Tuck this rim of dough underneath itself so that folded edge is flush with pan lip. Flute edging or press with fork tines to seal. For a non-lattice top crust, cut three slits on dough top. If pie dough is very soft, place in freezer for 10 minutes.
- Place pie on baking sheet and bake until top crust is golden, about 25 minutes. Rotate pie and reduce oven temperature to 375 degrees; continue baking until juices bubble and crust is deep golden brown, 30-35 minutes longer.
- Transfer pie to wire rack; cool to room temperature, at least 4 hours.
 Read more!
Saturday, December 8, 2007
Saffron-Nutmeg Rice Pudding: Sugar High Friday!

Something has happened. There used to be no stopping me from gravitating straight toward the chocolate. In Baskin Robbins, I had no control over my constant need for chocolate raspberry truffle, and therefore tasted almost no other flavors for about six years. My mom could hide all the candy in the house and I wouldn't notice, but if chocolate had a hiding place, I could find it in a flash. Lately, my long-standing chocolate obsession has taken a backseat to simpler things. Exhibit A: this little rice pudding number, featured in the latest issue of gourmet. I turned the page to the letters section, noticed the recipe for rice pudding with (gulp) nutmeg as the only flavoring (not even vanilla!) and thought, I. must. make. this. now.
So I did.
Where has all the chocolate gone? No matter. If you make this rice pudding, I guarantee you won't miss chocolate, no, not one little bit. Nutmeg may sound "simple" when you shake it from the jar into your carrot soup (the subject of a later post...stay tuned!) But when it's freshly grated, when it stands alone on arborio rice -- with just some milk, cream and sugar to pull the pudding together -- why, nothing could be more complex. Nutmeg is a "warm" spice, at once spicy and sweet, with a real bite and a pleasant bitterness that make it irresistible. In the jar, its flavor gets somewhat muted, so grate some from a whole nutmeg whenever possible. I bought 20 whole nutmeg pieces for a buck fifty, so it shouldn't set you back much, and it's truly worth it.
Now, I'll be honest: I didn't stop at the nutmeg. After all, something as simple as rice pudding provides a golden opportunity to play around. I happened to buy a (relatively) big box of saffron a couple weeks ago, and I've been waiting for a chance to use it. What better than a bright yellow, saffron-nutmeg flavored rice pudding? So it was settled.
 Aside from the nutmeg, what drew me to this recipe was the stirring -- or lack thereof. Typically, rice pudding means hovering over the stove until your back aches, stirring the thing around and around so it doesn't clump or stick or overcook. Needless to say, it's a pain. But this recipe was for baked pudding: simply mix the ingredients in the ramekins themselves, stick'em on a baking sheet, and bake'em in the oven for an hour. Let's face it -- not much could be easier. And I'd be surprised if you don't scrape your bowl clean, as I did. Saffron-Nutmeg Rice Pudding: my entry for this month's Sugar High Friday.
 Saffron-Nutmeg Rice Pudding adapted from this month's Gourmet
serves 4.
- 2 cups whole milk
- 1/3 cup Arborio rice
- 8 tsp. sugar
- salt
- whole nutmeg
- 12 threads saffron
- 4 Tbsp. heavy cream
- Preheat oven to 325 degrees, and put rack in the middle. Butter the ramekins.
- Add 1/2 cup milk, 4 tsp. rice, 2 tsp. sugar, and a pinch of salt to each ramekin. Grate a bit of nutmeg over each, and put 3 threads of saffron in each. Stir well to combine, and ensure that the spices don't float, if possible.

- Put ramekins in a shallow baking pan and bake until most of the milk is absorbed and the tops are golden-brown, about 1 hour.
- A skin will form on each ramekin; remove the skin.

- Stir 1 Tbsp. cream into each pudding until creamy. Allow to cool, and if desired, refrigerate 30 minutes until chilled.


- Enjoy -- don't forget to scrape your ramekin to the last drop.


Monday, December 3, 2007
Blueberry Tartlets and Cooking Club #2
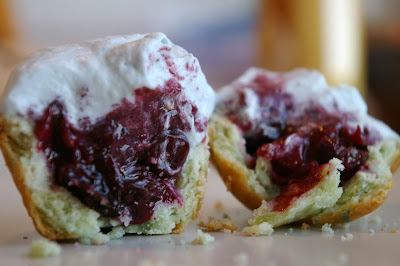
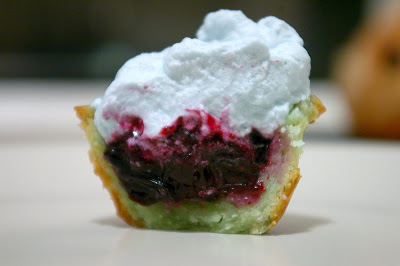
Sunday night was another installment of "Ladies Who Cook....Sometimes." This month, the theme was "dishes with color." My attempt was quite the adventure -- but I'll get to that in a moment.
It was all sorts of wet and ugly outside, and our first course of squash and pear soup was a perfect foil to the cold, rainy weather. Not surprisingly, it was our orange/yellow element. We also had beet salad (purple), shells with light cheese sauce (white), pesto bread (green), cranberry bars (duh), and my creation....blueberry tarts. Now it's safe to say that by making blueberry tarts, I was intending to bring something blue. That said, the tart dough came out green, the blueberry mixture was a deep shade of purple, and the whipped cream was...um, periwinkle. If you put them all together and mix them up, they'd probably make blue, though, right?
Anyway, what really matters is how they tasted....and that, my friends, was pretty darned good. Especially considering I made them without ever referencing a recipe, I was pleasantly surprised when I bit into one. The filling was slightly sweet, with still-intact blueberries bound together by a substantive but un-goopy sauce and a hefty dose of brandy. I'd make them again in a flash, if only to do the flambé part again! I've posted the recipe below, as usual, along with two other recipes from last night's event: cranberry bars and squash-pear soup. If you make any of these, it shouldn't be tough to draw a hungry crowd.
 Brandied Blueberry Tartlets
makes 22 tartlets
Tart Dough (adapted from Tartelette)
- 1 1/2 cups flour
- 1/2 cup powdered sugar
- 1 stick and 1 Tbsp. butter
- 1 egg yolk
- 2 drops blue food coloring, if you're so inclined
Blueberry Filling:
- 1 pint blueberries, washed and dried
- 2 1/2 Tbsp. sugar
- 1 1/2 Tbsp. flour
- 2 Tbsp. butter
- a generous splash (1/4 cup) Brandy
Make Tart Dough:
- In food processor, combine butter, flour, and sugar. Blend until the mixture resembles coarse meal. Add egg yolk, and pulse until dough comes together. Wrap in plastic wrap and refrigerate at least 45 minutes, until no longer soft.
- Unwrap chilled dough and hit a couple times with a rolling pin to soften. Take thumb-sized pieces and press them into tartlet molds. Using your thumb and forefinger, press the dough up the sides of the molds.
- Preheat oven to 350 degrees.
- Now, make the blueberry mixture: In a shallow pan, combine butter and flour to make a roux (melt the butter and stir it around in the flour; this will thicken the blueberries). Add blueberries, and toss to coat. Add sugar and stir until dissolved. Now, add brandy, all at once. At this point, you can either: a) shake the pan around over a gas flame until the flame licks the edge of your pan and the brandy catches on fire, or b)take a match to the brandy and let it burn, baby!
- Once the flame has burned off all the alcohol in your brandy the blueberry mixture should be well emulsified and ready to use. Turn off the stove.
- Anchor the tartlet shells by piercing them a couple times each with a toothpick. This should prevent them from puffing up. Pre-bake the shells for 10 minutes, or until golden.
- Meanwhile, whip your cream (and add some blue food coloring if you want to be wacky).
Fill baked shells with blueberry filling, and top with whipped cream. Don't get them all over your face, now!
 Cranberry Bars from Sara Rahnama
- Makes 12-18 bars
- 1 1/2 sticks unsalted butter, cut into 1/2-inch cubes
- 2 cups whole wheat all-purpose flour
- 1/2 teaspoon salt
- 1 cup plus 2 tablespoons brown sugar
- 3 cups fresh cranberries
- 1/4 cup water
- 1 tbsp lemon zest
- Confectioners sugar for dusting
- Preheat oven to 350°F with rack in middle.
- Line a 9-inch square baking pan with parchment paper, leaving anoverhang.
- Blend butter, flour, salt, and 1/2 cup sugar in a foodprocessor until mixture begins to clump together. If the mixture is toodry, add up to 1 tbsp cold water. Press into bottom of pan.
- Bake until pale golden and sides begin to pull away from pan, 25 to 30 minutes.
- While crust is baking, cook cranberries, remaining 2/3 cupsugar, lemon zest, and water in a 2-quart heavy saucepan over mediumheat, stirring occasionally, until berries burst, 6 to 8 minutes.
- Pour cranberries over crust and bake until edge is golden, about 25minutes.
- When the bars have cooled completely, sift confectioners sugarover top. Lift out of pan using overhang and cut into squares.
Butternut Squash Pear Soup From Joey Loewenstein
(from Noteworthy Two, A New Recipe Collection from the Ravinia Festival)
Serves 6-8
- 1 and ½ quarts chicken broth
- 2 and ½ pounds butternut squash, peeled, seeded, in 2-inch pieces
- 3 ripe pears, peeled, cored, quartered
- 1 large onion, chopped
- 2 medium shallots, peeled, chopped
- ½ t. nutmeg
- ½ c. half and half
- salt and pepper to taste
- 6-8 T. sour cream, optional
- 1-2 t. cinnamon, optional
- In large pot, heat chicken broth. (We used vegetable broth and it worked great....so for all you kosher folks out there, vegetable broth works just fine!)
- Add squash, pears, onion, shallots,and nutmeg. Bring to boil. Reduce heat and simmer 30 minutes or untiltender.
- In food processor, puree mixture in small batches (OR, BETTER YET, GET A HAND BLENDER. TOOK ME 2 MINUTES! CAREFUL, THOUGH, NOT TOSPLASH! TURN THE BLENDER ON AFTER YOU PUT IT INTO THE MIXTURE).
- Return to pot, stir in half & half, salt & pepper. Cook over low heat untilhot. Serve with dollop of sour cream and sprinkle of cinnamon.
Tuesday, November 20, 2007
Chocolate Souffle, much improved!
Ghirardelli in the double boiler, egg whites in the mixer, and D asking for Duncan Hines yellow cake to no avail...it all can only mean one thing: chocolate soufflé. That's right folks, I'm at it again.


 Chocolate Souffle
- 1 tablespoon unsalted butter, softened
- 10 1/2 ounces (10 squares) extra-bittersweet chocolate
- 1 1/3 cups whole milk
- 1 tablespoon cornstarch
- 3 large egg yolks, room temperature, lightly beaten
- 6 large egg whites, room temperature
- 1/3 cup sugar; more for soufflé ramekins
1. Heat oven to 400 degrees. Butter and sugar six 6-ounce soufflé ramekins. Place on a rimmed baking sheet; set aside.
2. In a double boiler over medium heat, melt the chocolate until smooth. Remove from the heat and keep warm. (I found I had to stir it around with a fork every so often to keep it from getting chunky, but that will depend on your chocolate. The higher percentage of cocoa, the more you may need to stir.)
3. In a medium heavy-bottom saucepan combine milk and cornstarch. Stir well with a wooden spoon to combine. Bring the mixture to a boil over medium heat, stirring continuously, until thick.
4. Remove milk mixture from the heat, remove any skin that may have formed on top, and stir in warm melted chocolate. Let cool slightly. Add a bit of this mixture to the egg yolks to temper them, then add the lightly beaten egg yolks back into the milk mixture and stir until well combined.
5. In the bowl of a heavy-duty mixer, whip egg whites on medium speed until soft peaks form. Slowly add sugar and increase speed to high. Whip until shiny and stiff peaks form, about 3 minutes.
6. Using a whisk, lighten the chocolate mixture with about 1/3 of the beaten egg whites. Stir until well-combined. Using a large rubber spatula, fold in remaining egg whites until just incorporated.
Wednesday, November 14, 2007
My quest for the perfect chocolate souffle

Three months of blogging and I actually have managed to not write about chocolate. It's really an embarrassment. Rarely does a day go by when I don't eat the stuff; how have I not blogged about a chocolate recipe yet??
Time to solve that. Chocolate Souffle may be light and fluffy, but it's one of the richest ways to have your chocolate. When done properly, a delicate crust gives way to light but shockingly-rich innards, which deflate and melt on your tongue. Even better is when it's cut with straight cream at the table...ok, drooling.
I'll sing the praises of chocolate souffle forever, but finding the perfect recipe is proving to be a challenge. That's why this is the first in a series of posts, in which I'll try various recipes for chocolate souffle, rate them, and (hopefully) find or develop a foolproof recipe.
Recipe 1 comes from one of my favorite bloggers, Bea at La Tartine Gourmande. Her version calls for infusing the milk with fresh cardamom pods, which I love but don't have around the house, so I left them out. Here's the rundown:
Pros
- the batter had a nice, light texture that stood up to a bit of over-mixing
- the 20-25 minute cooking time was exactly right
- the recipe called for equal numbers of yolks and whites, which means no egg-parts sitting in the fridge and a very happy Rivka :)
- mine didn't rise to the heights that Bea's did. Who wants pouting souffles?
- I used more chocolate than Bea called for, and my souffles were simply not chocolate-y enough. More chocolate more chocolate!
 Read more!
Thursday, October 25, 2007
Lemon curd raspberry tartlets
 It is super-duper chilly this morning and fall is finally setting in. Crisp air in my face and the crunch of leaves beneath my feet give me a serious hankering for some pumpkin soup!
But this post is about tartlets.
Everyone makes muffins; nobody makes tartlets. Yes, they're not as quick and easy to make as muffins are, but they're so much cuter and (IMHO) more delicious. Can't compare muffins and tartlets? Yes, yes I can. I just did! Tartlets > Muffins. Make some tartlets!
Here's the good thing about the tartlets I make: they're delicious. Ok, just kidding -- they're also not as time-consuming because the steps overlap with each other, as follows:
make the dough (about 5 minutes in a food processor)
make the filling while you refrigerate the dough
make and bake the tartlet crusts while you refrigerate the filling
let the tartlet crusts cool while you get the filling ready to pipe
fill tartlets and serve
See? Not so bad.
And the lemon curd filling is really not too hard to make. It does involve some pot-watching and some vigorous whisking, but it's worth the effort; whatever extra filling you have after finishing the tartlets is wonderful eaten out of the bowl, just so.
Today's post is about the lemon tartlet in the background of the picture above; the tartlet in the front of the picture is a posting for another day.
Lemon Curd-raspberry tartlets
makes about 25 tartlets.
Tart Crust: taken from Tartelette
1 1/2 cups flour
1/2 cup powdered sugar
1 stick plus 1 Tbsp unsalted butter, chilled and cut into small pieces
1 egg yolk
Blend dry ingredients with a hand or stand mixer. Add butter and blend until mixture resembles coarse meal. Add egg yolk; blend until dough comes together. Wrap in plastic, and refrigerate while preparing ingredients for the tart.
While the dough refrigerates, prepare the curd:
zest of 2 lemons
1/2 cup lemon juice
1/2 cup sugar
2 eggs
1. Bring the zest, lemon juice and sugar to a simmer in a small saucepan.
2. Meanwhile, beat the 2 eggs until light.
3. When all the sugar has dissolved, add some of the hot lemon juice mixture to the eggs by the spoonful while beating the eggs, to temper them (in order to ensure that they don’t get scrambled.)
4. After you’ve added about 10-15 spoonfuls of the hot liquid and successfully incorporated it, pour the egg mixture into the saucepan with the rest of the lemon juice mixture, and bring to a simmer (not a boil) over medium heat until it thickens, about 5 minutes.
5. Transfer to a bowl and refrigerate until cooled completely, at least 1 – 1.5 hrs.
Back to the tarts…
After about half and hour, the tart dough should be just chilled enough that it can be worked with, but will not disintigrate. Take a walnut-sized piece of the dough in your hand, roll it gently into a ball, and, using your thumb, press it into a tartlet mold (in my case, I have a tartlet pan wth 24 molds). Try to ensure that the dough is spread evenly throughout the mold. This will make for even baking.
“Dock” the dough by spearing each tartlet a couple times with a fork – this ensures that they’ll keep their shape as they cook. Bake the empty tarts in a 350 degree oven for 10-15 minutes, until golden.
Assembly:
Scoop cooled lemon curd into a plastic bag, and cut off the very tip of the bag. Hold the bag just above the inside center of a tartlet, and squeeze, raising the bag as the tartlet fills. Repeat for each tartlet.
Top with either fresh raspberries or (as I did) frozen raspberries that I cooked down with a bit of sugar.
Enjoy! Read more!
Tuesday, October 23, 2007
Pumpkin-Chocolate Chip Ring

Here's my one confession about the recipe: David Lebovitz is a professional. He used to be the pastry chef at The French Laundry, an acclaimed restaurant, and has written several fantastic cookbooks (including The Perfect Scoop, which has the best ice cream recipes EVER.) The point is, being a pastry chef means that he's very precise in his instructions, and I'm sure he's right that following those instructions will yield a better, lighter cake. having said that, I didn't follow any of his instructions (see all my asterisked notes throughout) and my cake came out fine. Do as you please....but I'm telling you, my "wrong" way works, too.
Pumpkin Chocolate Chip Ring
adapted from David Lebovitz.
serves 10-12, or 20ish if you cut thinner or half pieces.
2-1/2 cups whole wheat flour
1 tsp baking soda
1 tsp cinnamon
1/4 tsp. nutmeg
2/3 cup chocolate chips
2/3 cup canned pumpkin
1 cup plain yogurt or sour cream
1/4 cup plus 3 Tbsp brown sugar
2 large eggs
3 teaspoons oil
2 teaspoons vanilla
1. Position a rack in the center of the oven and preheat to 350 degrees.
2. Mix together dry ingredients in a medium bowl and set aside.
3. In another bowl, mix together the wet ingredients and blend with a mixer on high until frothy, 1-2 minutes.*
4. Make a well in the center of the dry ingredients and add the wet ingredients. Stir together JUST UNTIL MIXED and add the chocolate chips. DO NOT OVERMIX.**
5. Grease a non-stick ring pan. If using a regular ring pan, grease and flour to ensure that the cake comes out cleanly. Spread the batter into the pan (and as usual, other pans will work -- the ring does look pretty, though.) David says "spread using a gentle touch."
6. Bake until top of the cake springs back when touched, about 40-42 minutes depending on your oven. DO NOT OVERBAKE.
7. Let cool on a wire cake rack, then invert. Let cool completely, then sprinkle with powdered sugar.
*I didn't use a hand mixer -- I just whisked the wet ingredients with a fork for a minute or two, until well mixed and light.
** I committed the sin of adding dry to wet -- and my cake still came out light and fluffy.

**Note: I've gotten a couple questions about how to make this pareve (non-dairy). The answer: subsitute David Lebovitz's wet ingredients for mine:
1/3 cup plus 1 tablespoon canned pumpkin
1/4 cup unsweetened applesauce
grated zest of 1 orange
1/4 cup fresh orange juice or water
3 tablespoons packed dark brown sugar
1 large egg 1
1/2 teaspoon vegetable oil
1 teaspoon vanilla extract
The instructions in this recipe are the same for a pareve version of this cake, as they're mostly taken from Monsieur Lebovitz himself. Read more!
Monday, October 22, 2007
Not Derby Pie (revised, with recipe!)

"Not Derby Pie."
"Not Derby Pie?"
"yep."
"Well if it's not Derby Pie, then what is it?" and, after a moment's hesitation, "what is Derby Pie, anyway?"
My mother laughed, as she often does -- then told me to just try it already.
The backstory: Derby Pie® is the exclusive product (and name) of Kern's Kitchen. According to their website, "Derby Pie® was born nearly a half century ago as the specialty pastry of the Melrose Inn, at Prospect, Kentucky. Once developed, a proper name had to be given. Because each family member had a favorite, the name DERBY-PIE® was actually pulled from a hat." While I've never had the original, the concept of the pie is genius. A deep-dish pie shell is sprinkled generously with chocolate chips, then loaded to the top with nutty nougat filling and baked just until set. What more can a pie-lover want?
In 1982, in an article by Phyllis Richman profiling Kern's Kitchen, The Washington Post featured a recipe for Not Derby Pie. My mom took hold of this recipe and never let go -- she made it very often and it was an instant hit among friends. Admittedly, I was a nut-hater at the time, and the pie didn't much strike my fancy. I did, however, manage to eat the entire bottom layer of two slices and pick through the nougat a bit before calling it quits. Once I discovered how fantastic nuts are, this pie quickly climbed high on my favorites list. It's one of my go-to recipes for Friday night dinner parties, and an unfailing success.
Not Derby Pie (adapted from the Washington Post)
serves 8-10.
1 pie crust or graham cracker crust
1 stick margarine or butter
1 cup sugar
2 eggs
1 tsp vanilla
2/3 cup flour
1 cup chopped or ground walnuts
1 cup chocolate chips
1. Combine sugar, eggs, vanilla, and flour; mix until ingredients are incorporated.
2. Melt butter, and allow it to cool a bit; pour butter into mixed ingredients very slowly. Mix to combine. Add nuts and stir just until incorporated.
3. Sprinkle chips into the bottom of the pie crust. Pour mixture over.
Bake at 325 degrees for 1 hour.
...really, that's it.
Tuesday, October 16, 2007
The easiest cake ever
 Many thanks to Elena, who gave this recipe to my mom, who practically forced me to make it. This cake is deceiving: its ingredient list and instructions are so short and sweet, you could make it blindfolded. But don't let the ease deceive you; this cake is definitely better than the sum of its parts. Throw the ingredients in a bowl, mix (by hand!), chop the fruit, throw it all into a springform (or regular pan), bake, and voila, a perfect dessert is yours.
 Make sure your fruit are ripe; this will really add to the overall flavor and moistness of the cake. Also, as this recipe is so darn basic, feel free to improvise! Here are my favorite variations:
-pears, lots and lots of pears
-plums and peaches
-blueberries and pears
-raspberries
-raspberries and peaches
You get the drift -- do whatever you like. One last note: I tend to arrange sliced fruit on the bottom of the springform, so that when I turn the cooled cake onto a serving platter, the bottom (now the top) looks pretty. This is entirely optional. In fact, I didn't do it this time because my pears were very ripe, and too delicate to mess around with. If you're using a regular, non-springform pan, you can do as my mother does, and arrange fruit on top of the batter. They will sink in a little as the cake bakes, but you'll still be able to see them.

The Easiest Cake Ever
serves 8-12.
1 cup flour
3/4 cup sugar
2 eggs
1/2 cup canola oil
1 tspoon baking powder
1 tspoon vanilla
zest of 1 lemon
3 cups of fruit, any variety, but soft and juicy!
Combine all the above ingredients, reserving 1 cup of the sliced fruit.
Grease and flour a 9" round or rectangular baking pan or springform pan.
At this point, EITHER:
1) pour in batter and add the last cup of fruit on top OR
2) arrange the remaining sliced fruit in spiral design in the springform, and pour batter overtop.
I sometimes sprinkle a bit of sugar ontop for a crunchy crust.
Bake at 350 degrees for 1 hour.
I often serve this cake with a fruit sauce or reduction; it's pictured here with quince sauce, and I'll post that recipe soon. Read more!
Thursday, October 11, 2007
Strawberry Rhubarb Tart with Almond Streusel
 Rhubarb is finally, finally in season ... it's about time.

 When I got my CSA box this past week, I was pleasantly surprised to find rhubarb among the contents. I later realized that this was because I had ordered rhubarb, then forgotten about it...but still, what a pleasant surprise! I'm entertaining this weekend, and rhubarb is a great place to start.
 I promise to post more rhubarb recipes as more of it pops up in my CSA box. For now, this tart is a riff on my usual strawberry rhubarb pie recipe. Unlike pie crust, tart crust is sweet and less crumbly. While my pies usually have a lattice or crumble top, this tart is open-faced, garnished with a simple almond streusel. I do enjoy a good lattice crust, but this tart is an opportunity to show off your fruit-arranging skills. What? Yes, your fruit-arranging skills.

serves 8.
- 1 1/2 cups flour
- 1/2 cup powdered sugar
- 1 stick plus 1 Tbsp unsalted butter, chilled and cut into small pieces
- 1 egg yolk
- 3 stalks rhubarb, cleaned and cut into 4-inch-long slices
- 1 piece of the rhubarb thinly sliced (for the tart's center)
- about 12 nice strawberries, cleaned
- 1/2 cup granulated sugar, more for dusting
- 1 tsp. cinnamon
- grated zest of one orange
- powdered sugar for dusting, optional

Slice strawberries one at a time, and arrange, fanned out, between the rhubarb slices. Sprinkle the whole thing with the sugar mixture.
- 1 cup sliced almonds (I prefer toasted but raw is fine too)
- 1/2 cup light brown sugar
- pinch salt
- half a stick of butter
- 1-2 Tbsp. flour


